Tutorial
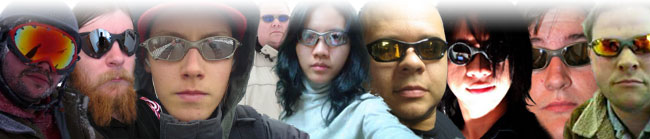
First start out with a glamorous PW shot. Since we're all to strikingly handsome, this should be easy:

We want to isolate the lens portion and simply turn everything else B&W. There's a few ways we can select the lens.
First is the Lasso tool found in the toolbar. If you hold and click you have the option of the Freehand, Polygon and Magnetic lasso.

The freehand takes a lot of hand skill and often doens't stay in the lines.

The polygon is nice since you don't have to concentrate on getting it right all in one shot. Just click on the points, and the lasso will connect them.

The magnetic lasso is nice since it finds edges and automatically snaps to them. Just click once and move your mouse in the general area, and it will automatically select. If it goes astray, hit the backspace button. If you want to force a point, just click.

The magic wand tool also will automatically select, based on color. Both these two auto tools work best in areas of high contrast, so keep that in mind.

In any of these methods, you need not finish in one shot. Once a selection is complete hold the Ctrl key to append the next selection. Hold Alt to subtract. You can even switch tools between selections. Using the Magnetic or Polygon lasso and then freehanding the gaps might work.
I recommend the pen tool. It takes a little more skill, but for this purpose, it's dead on. Since there are no feathered area to bother with, a nice crisp line is all we want.

Make sure you choose the middle option so you just make a path not a shape

On your first click, drag in the direction you intend to follow in order to start the selection. Make the two bars roughly equal to what you see here.

Repeat by draging around the circle in even intervals. If a point doesn't match up, you can reposition it by holding Ctrl and dragging the point. You can also mose those control bars branching off each point to adjust the curve. Once you get around the lens, end the path by clicking on the original point, and it will create an enclosed path.

Now to the right you should have a Paths tab. If not choose it from Window > Paths. Right click on the working path and choose Make Selection. This will convert the path to a selection and achieve the same end results as the lasso method, although a little cleaner.

When this box shows up make sure feather is set to 0, and antialias is on. This will keep the edge crisp but not blocky.

The selection should look like this

Go to Layer > New > Layer via Copy. You could simply perform a Copy Followed by Paste, but I've had some issues with the new layer not retain its position. This method will ensure that the copy of the lens stays where it originally was, but on a new layer.

Repeat for the other lens, but make sure to reselect the Background layer before you copy the second one or else, it will try to copy empty space from the other lens's layer and you will hear the annoying Windows 'ding' sound.

Once done, select the Background layer again and choose Layer > New Adjustment Layer > Black & White.

Just accept and click OK

While we could have simply desaturated the image, it would have ended up looking like this. It works, but the rest of the image is just sort of grey. While we do want the lenses to pop out, the remaining portion of the image shouldn't be uninteresting.

I'm sure there's a rhyme and reason to what we can do with this panel, but I'm of the type to just mess around and see how each turns out. Basically at this point, we're altering the base colors of the image to enhance the contrast. Since it all ends up greyscale in the end, the source colors can be shifted in ways that would ordinarily look like a neon mess. I shifted the green up which brought out some details in the ugly painting behind me. Brought the Red up to whiten the skin, and also the Blue/Magenta to make the shirt darker.

There's no right or wrong at this point, but I like the look of this better.

Finally go to Layer > Flatten to merge all the layers down into one.

I then went back in and added the red highlights for the Unobtainium. At this point my image was flattened, so I didn't have the source colors to work with anymore. You can fake it by creating a new layer and setting the transfer mode to Multiply. Then choose the paintbrush and red as a color and paint over the areas you want. This will end up putting red on light areas but not dark. Think of it as using a marker on a black and white paper image.


.jpg)


 Glasses
 Goggles
 Watches
 Alphabetical
 Video Reviews